Once you get used to the feel of a mechanical keyboard, it’s hard to go back to cheap membrane models. And while the best mechanical keyboards can cost hundreds of dollars, there are plenty of affordable, sub-$50 keyboards that are very pleasant to use. If you’re still drooling over that aluminum endgame deck with lubed Zealios switches and custom keycaps, though, you might feel like your current budget model is inadequate.
Don’t: there’s still a lot you can do to that cheap keyboard to make it feel higher-end, even if it doesn’t quite reach the same heights as the stuff you see on /r/mechanicalkeyboards. Here are some mods worth trying.
Grab Some Affordable Keycaps

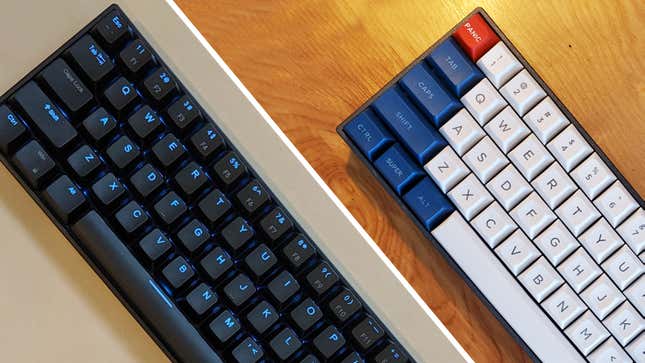
Keyboard nerds like to obsess over switches, and while different switches can change the sound and feel of your keyboard, I actually think keycaps make a bigger difference than most people let on. It’s not just about your keyboard’s looks: the right set of keycaps will feel nicer, and in my experience, can even make it easier to type without making mistakes. (Seriously.)
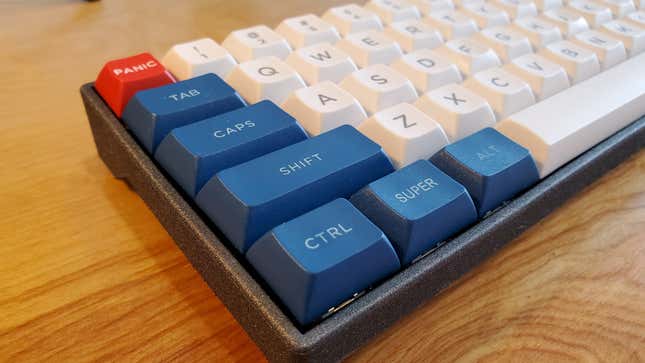
I’ve written about custom keycaps a lot already, but here’s the gist: I generally recommend PBT keycaps over the cheap ABS ones that came on your keyboard. While high-end ABS sets can be great, PBT is probably a better option on the low end, offering a textured finish that sounds great and doesn’t get shiny with fingerprints over time. You can find tons of options on Amazon, eBay, and AliExpress, including popular colorways like 9009, Carbon, or Dolch for around $30 (And don’t worry, that’s the most expensive mod we’ll do in this guide.)
I also recommend paying attention to the profile of the keycaps. Most keyboards you buy use the standard “OEM” profile, though I myself prefer the similar-but-shorter Cherry profile. I’m not sure what it is, but after going back and forth between the two, I find Cherry profile keys are easier to type on, and I make fewer mistakes when doing so. You’ll also find sets in the DSA and XDA profiles, which are even shorter and have a uniform shape across the entire set, which makes for a great looking keyboard.
Browse around to see if you find something you like—you’ll find lots of sets on eBay and AliExpress that aren’t on Amazon, so be sure to cast a wide net. And don’t forget to grab a wire keycap puller, either.
Alter the Case’s Sound, Feel, and Look

Your case can also affect the sound and feel of your keyboard more than you might realize. Plastic cases with lots of empty space create a loud, deep thocking sound when you type—which a lot of people like! But you can also play around with different case mods that alter that sound and feel.
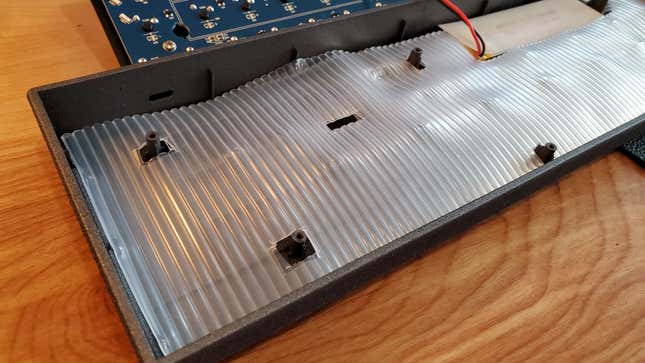
High-end keyboards with aluminum cases, for example, have a more solid construction that tends to dampen that sound. While you can’t get the exact same feel from plastic, you can get closer by filling in some of that empty space under the PCB (what some call “stuffing” their keyboard). To do so, you’ll need to remove the keycaps with your keycap puller, unscrew the plate and PCB, and remove it from the plastic case.
Different materials will sound and feel different, so experiment with whatever household products you can get your hands on—I’ve seen people use everything from felt to rug pads to craft foam. I myself grabbed some spare shelf liner, cut it to size, and stuck two layers of it in the bottom of my case (with holes for the screws, of course). It noticeably improved the sound and feel, with less of that deep echo. If you want to spend more, a lot of people recommend Sorbothane as well, which is specifically designed to absorb sound.
If you want to change the color of the case to fit better with your keycaps, you can obviously give it a coat of spray paint, too, with the right technique. (I used Plasti-dip on mine, since it’s completely removable—but I can’t say I’d recommend it too highly, since it flakes off pretty easily.) Vinyl wraps can also look great, though it’s more difficult to do properly, so watch some tutorials before you dive in. I have the least experience in this area, so I defer to others more knowledgeable than me on best practices.
Add a Bit of Lube

Finally, cheap keyboards tend to use cheap stabilizers on the large keys (like Enter, Backspace, and Spacebar) that rattle more than their higher-end cousins. But this too is fixable, to an extent: A bit of lube on your stabilizers can make a big difference.
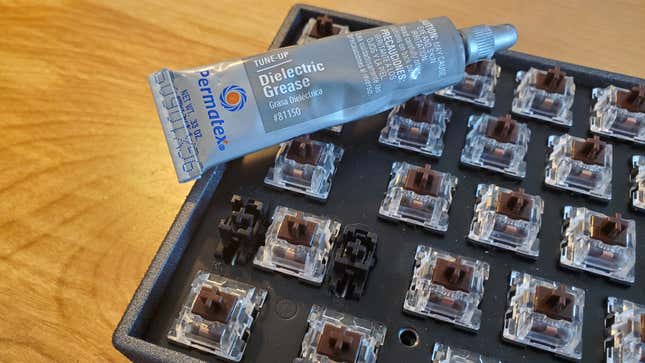
Traditionally, lubing stabilizers requires desoldering your switches and removing the stabilizers entirely—though I’ve had good luck with a paper clip, some dielectric grease, and steady hands. This YouTube video does a good job showcasing the process without desoldering. Some people also put a small piece of cloth Band-Aid on the PCB under the stabilizer, but I’m not personally a fan of the sound and feel this creates. I did, however, put a piece under the stabilizer’s clip, to prevent that part from rattling against the plate—just make sure not to pull the stabilizer out entirely, since it’s nearly impossible to put back in without desoldering the switches.
While we’re on the subject of lube, a lot of enthusiasts also lube their switches for a similarly smooth, quiet feeling—though it’s a lot more work, and may not be worth the effort on a budget board. Again, you need to desolder every switch, use a switch opener to open each one up, lube it with a small paintbrush and some very specific types of lubricant—you can read more about which to use here—then solder them all back together. You can lube parts of the switch without desoldering, but it’s not going to be as effective, and I’m sure purists would laugh at me for even mentioning the possibility.
There are a few budget-focused keyboards out there with hot-swap switches, like the Velocifire TKL61WS and the GK61. This allows you to remove your switches without desoldering anything, making the lubing process—for both switches and stabilizers—much easier. You could also swap in new switches, but note that most of these budget hot-swap boards are only compatible with switches of the same brand (that Velocifire can only have other Outemu switches swapped into it, for example). A few, like the Hexgears GK705, allow you to swap in any brand of Cherry-style switch, but most hot-swappable boards like the Glorious GMMK are a bit outside the budget we’re talking about here.
You can see how deep this rabbit hole goes, but don’t be afraid to experiment. All of these mods are fairly cheap, and can turn a sub-$100 keyboard into something unique—it may not be on the level of a multi-hundred-dollar custom board, but it’ll still be a step up, and it’ll be yours.